

How to: Toggle your Salesforce automation with ONE checkbox!
We’ve all been there, in the middle of a data load and you’re getting error after error. If the cause isn’t bad data, then it’s usually a whole host of automation (validation rules/process builders/flows etc) which is the issue. In my 10 Easy mistakes I made as a Salesforce Admin post, number 9 on the list was ‘disabling automation and validation’ during data migration or manipulation tasks. Depending on your environment, this can be quite a task to go through and manually disable each of these, costing you unnecessary valuable time. In this post I am going to show you a single way through custom metadata and a checkbox to toggle on or off your automation.
If you don’t like reading, you’re in luck. Check out the video version below:

Firstly, it’s important to understand why and what custom metadata is within Salesforce. It’s important to note that this can also be done with custom settings and custom permissions (if you want to assign to specific users) for those of you who’re familiar with those. The reason why using metadata over custom settings is more beneficial is you’re able to deploy custom metadata the same way you would a custom object, whereas this is not the same for custom settings.
If you’ve ever created a custom object within Salesforce, both custom settings and custom metadata are essentially the same. We have the ability with these to create custom fields and store data within them which can then be referenced elsewhere within your environment, whether it be through code or you guessed it.. automation. This gives you a single reference instead of having to create/store whatever you choose to on each individual object.
Also, if you’ve installed a package from the AppExchange, it’s likely the global settings for that are either custom metadata/settings, which allows the admin to go in and easily change values without having to dig around code etc.
Here are some great Trailhead links if you’re just getting started:
https://trailhead.salesforce.com/en/content/learn/modules/custom_metadata_types_dec/cmt_overview
https://trailhead.salesforce.com/en/content/learn/modules/custom_metadata_types_dec/cmt_create

The first thing we need to do is create our custom metadata which can be referenced within our automation. To do this go to setup > search ‘custom metadata’ > click ‘custom metadata types’

Now ‘New Custom Metadata Type’ and you’ll be present with a screen as below. Notice anything familiar?
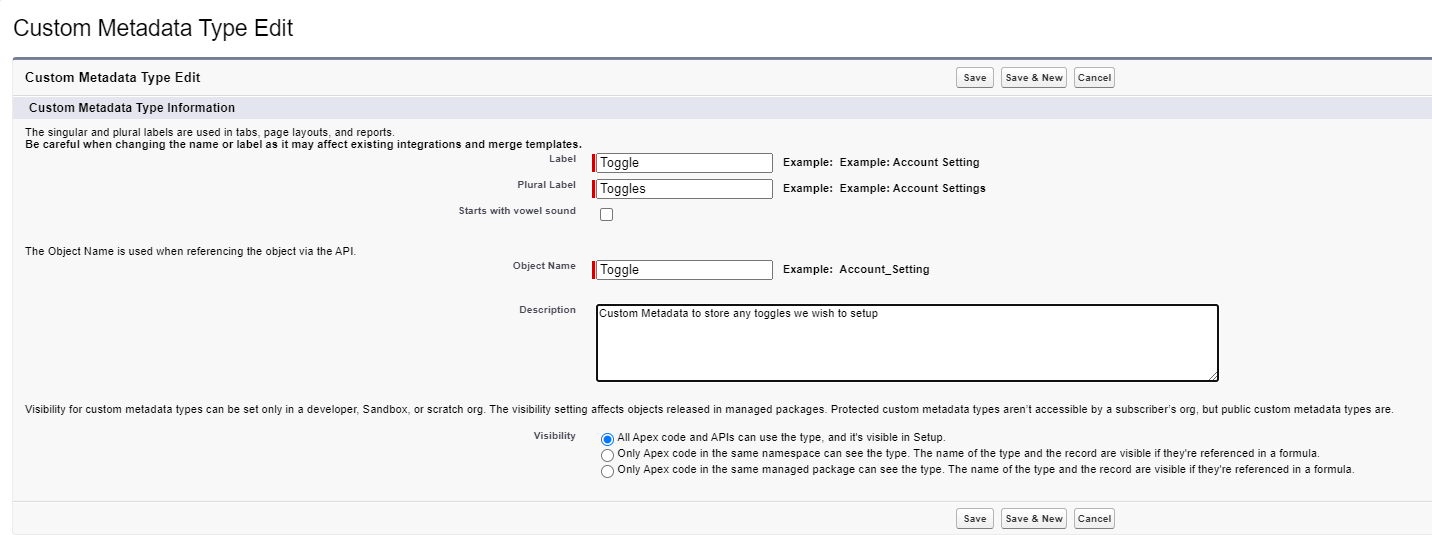
You can choose to name the object however you wish, or copy me. We’re creating our object so we can store our toggles. This post is focused on automation but you could also have toggles for a whole host of other stuff, such as apex if you wish. Now, we need to create our checkbox field to store the toggle value. Go to ‘New’ under the Custom Fields section.


Select ‘Checkbox’ as our field type and input the values as you wish, or copy my screenshot again. So now we almost have everything we need, simple right?. We’ve created our object, and our field, now we need to create a record to finish this section off. Select ‘Manage Toggles’ and then ‘New’

Now we’re creating the record which we’re going to reference within our automation/validation. Select the ‘Automation Toggle’ to TRUE (Meaning we still want it to fire) and input the label/name then hit ‘Save’

You’ve just setup a metadata type to control automation/validation, easy right?. Now we need to use this to determine if our automation/validation should fire or not. I am going to show you how to do this for a process builder and validation rule, but the principal is the same throughout anything you wish to toggle with this.

If you’ve already got all of your validation rules setup, i’m sorry, but you’re going to need to edit them to include our new metadata type. If you’re creating a new one, it should be easy. Here I have a validation rule on the Account object. It stops any users changing the Account.Name field (Built just for this - not the best example). As you can see it also includes a check using our new custom metadata type to see if that checkbox we created is TRUE. If it is TRUE, and someone tries to change the name field, they will get the error.

To add the metadata type to your rule is the same way as adding a field. Like below:


Now lets give it a try. The toggle is TRUE within the custom metadata, because that’s how we set it up. So I should be getting the error.

Now lets turn the toggle off within the metadata and try again:


No errors. The main effort will be updating existing rules, but this will save you loads of time in the long run.

The same that we did with the validation rules, we can also do with process builders. Within your criteria node, select ‘Formula evaluates to true’ then select the custom metadata as below:


Then follow the same path as above. Replacing ‘Toggle’ with whatever you named your object/field in the first steps.Now, the same as the validation, this will only run when our metadata checkbox = TRUE. If you’re adding this variable into an existing piece of config and criteria, make sure to use the AND() function as per my example so Salesforce is checking for both.

You can take this much further depending on what it is you want to achieve. Custom metadata types are very powerful and great to understand as they can be used for a whole host of things, this is just one example. You can also pair this whilst checking a profile/permission set, if you only wanted to disable for a subset of users. As always make sure you’re doing any data migration/manipulation tasks within a sandbox first to avoid making any mistakes!
I hope you found this useful and have been enjoying the content. Please subscribe to my Youtube channel for more. Any shares and comments are greatly appreciated and all the support has been amazing.

